Installing a Stair Lift Part 1
Published by Stephen on October 4, 2008Tools and Components
 When your AmeriGlide stair lift arrives, there will be three boxes. One box will contain the chassis or car, one box will contain the seat, and one box will contain the track. The track will already be precut to fit the length of your stairs. It is always important to get an accurate measurement of your stairs, because the dealer uses this measurement to cut the track. There is an old carpentry saying that says, “Measure twice, cut once” and this is just as applicable to stair lifts. Always make sure you have double checked your measurements, before you place your order.
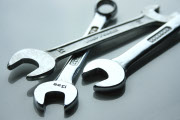
The first step in installing an AmeriGlide stair chair is to make sure you have all the required tools. You will need an electric drill with a 3/8 inch socket extender, the extender should be 6 inches long. You will also need a phillips head screwdriver, a set of standard allen keys, and a set of standard open wrenches, including wrenches sized 3/8, 7/16, and 9/16, a torque wrench (available at most auto-parts stores), and a level. You should also have eye protection and gloves.
You will also need to have an electrical outlet that is within ten feet of the top or bottom of the stairs. It is a good idea for this to be on its own breaker, but this is not necessary. Some lifts are battery powered, but even a battery powered lift will need to be plugged into the wall. If there is not an outlet within ten feet of the stairs, you will need to have a licensed electrician install an outlet for you.
Once you have all of the tools and the electrical outlet, you can begin the installation of the stair lift. At this point it is a good idea to do a quick inventory of all of the parts. This not only helps familiarize yourself with the parts, but also makes certain they are all accounted for.
Putting the Track Together
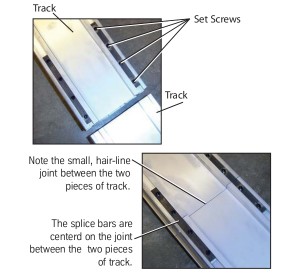
 The first step is going to be joining the individual pieces of track together. The metal track comes in several pieces and uses a set of splice bars that is located in the bottom part of each piece of track. Begin by laying the track out on the ground. It is possible to do it on the stairs, but this is generally not advised. After the track is lined up, begin securing the individual pieces together with the splice bars. Each splice bar has four screws in it, loosen the screws using the included allen wrench.
Then slide the splice bar out so that half of it is protruding from the end of the track. Tighten the two screws that are still in the piece of track, then slide the other piece of track onto the splice bars and tighten the remaining screws. If you have trouble moving the splice bars you can gently and carefully use a flat-head screwdriver and hammer to push them. There should only be a very thin crack between the two pieces of track.
After the track is complete, you will need to slide the gear into the track and line it up. A special tool comes with the lift that makes this very simple. This is called timing the gear rack.
Running the Wire
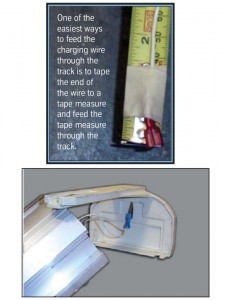
Once the track is complete, you will need to run the attach the end cap of the lift and run the charging wire through the lift. Whether you intend to plug the lift into the bottom of the stairs or the top, will determine which way you run the wire, but the process is the same. An easy way to do it is to attach the wire to a measuring tape and then simply run the measuring tape through the track.
The end of the track that will be plugged in will have two plugs on the end of the electrical wire. Once the wire is run, you can attach it to the end-cap and bolt the end-cap onto the end of the track.
No Comments |
Add a Comment